Pouring a Concrete Floor in Thailand.
Ground level concrete floor construction.
See the images.
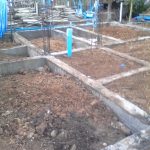
Before forming up and pouring the concrete floor the area was filled to the correct height with loose soil and any rocks that were laying around.
I made sure that there were no areas that were hard soil which might force up the floor if an earthquake hit the area.
The floor needed to be suspended and resting only on the under floor beams when finished and the soil under the floor will sink slightly due to settling.
With this ground level concrete floor I was advised that I could use the softer grades of ready mixed concrete.
I did not use the softer grade but found the hardest grade to be only a little more expensive so I used it.
I haven’t found any problem with using the harder grade of concrete, but then, I have had no need to try and cut through or drill it.
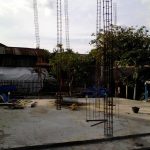
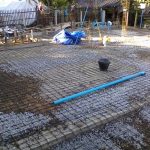
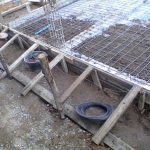
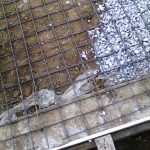
The steel mesh for reinforcing the concrete floor was made up by tying 6 millimeter round steel bar at 100 millimeter centers.
This was a slow and costly job and if I ever do this again I will look into using pre made weld mesh as done in Australia, calculations will be needed to make sure my design can support itself over the four meter spans.
The 6 millimeter round steel came in the usual 10 meter lengths.

POURING CONCRETE FLOOR
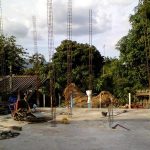
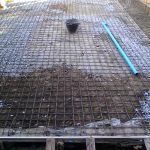
Under the steel I placed thin plastic sheeting, this proved handy when as low spots were easily found after a rain storm, they were then filled with gravel.
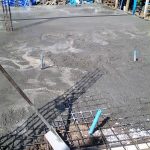
The thickness of concrete was specified at 100 millimeters.
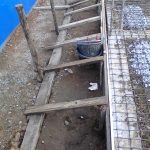
The outside under floor beams had 6 millimeter round steel bar at about 500 millimeter spacing embedded so as the tie the beams to the concrete floor.
At the point where the stairs meet the floor there is a row of 8 millimeter round steel bar protruding out of the concrete 500 millimeters, 1 meter long and at 100 millimeter centers, these tie the stairs to the floor.
As I needed 100 x 50 millimeter square section steel tubing throughout the roof, I bought this and wrapped it in thin plastic to be used as form work where needed.
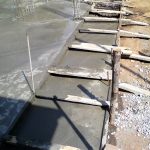
Most of the form work was wood which had been bought for the job.
The concrete wagons have extensions for their shoots and therefore no crane or wheel barrows were needed with this floor.
During the pouring of this first concrete floor I used a local builder as the interpreter, I had the feeling that he was trying to make some money out of the concrete delivery without me knowing.
I checked the paperwork carefully and insisted to the drivers that I wanted number one grade of concrete.
It looks like I got what I ordered and at the correct price but am still wondering if that builder was up to something.
The drivers of the wagons were helpful and not rushing.
I hung around to see that the wagons were fully emptied before they left.
The workers leveled the concrete well and gave the surface a rough finish as required.
During the pour I used a hook made from rebar to lift the reinforcing mesh up so it was not touching the ground under the concrete, the workers did not see to do this or think that it was necessary.
I poured water over the floor a few times over the following three days so as to slow the dryer process and give a stronger floor.
All went well with this first floor, the bathroom area was not poured, I don’t know why but it was later mixed and poured by hand.
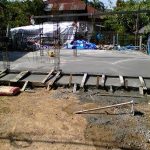
SPLIT LEVEL FOR PORCH
SEE THE CURVE
FLOOR TO BEAM STRAPS
STEEL REINFORCING
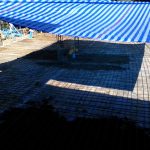
SHADE FOR WORKERS
LOOSE FILL
POURING FLOOR